Alright, let's talk about getting that fence of yours looking sharp. You've got a wooden fence, maybe it's new, maybe it's seen a few Sturgis winters, and you're thinking about giving it some love with stain or paint. Good on ya. It's a project a lot of homeowners can tackle themselves, but there are definitely some things you need to know to do it right and avoid a headache.
Before You Even Think About Brushes or Sprayers
Preparation is honestly half the battle here. Skip this part, and you're just wasting your time and money. Trust me, I've seen it.
- Clean that fence: If it's an old fence, it's probably got dirt, mildew, maybe some algae. You can't just paint over that. A good power wash is usually the way to go. Be careful with the pressure, especially on softer woods like cedar or pine. Too high, and you'll splinter the wood. If you don't have a power washer, a stiff brush, some water, and a good fence cleaner (follow the directions!) will work. Let it dry completely – and I mean completely – for at least 24-48 hours, depending on the humidity.
- Repair any damage: Loose boards? Nails sticking out? Rotting posts? Fix 'em now. Replace rotten sections. Hammer in those nails. Secure anything wobbly. Staining or painting won't magically fix structural issues.
- Sand it down (sometimes): For new, smooth wood, a light sanding with 80-100 grit sandpaper can help the finish adhere better. If your fence is old and peeling, you'll need to scrape off all that loose stuff first, then sand the rough spots. This is the part where people often get overwhelmed. If you've got a huge, old, peeling fence, this prep work alone might be worth calling a pro for.
- Choose your product: This is a big one. Stain or paint?
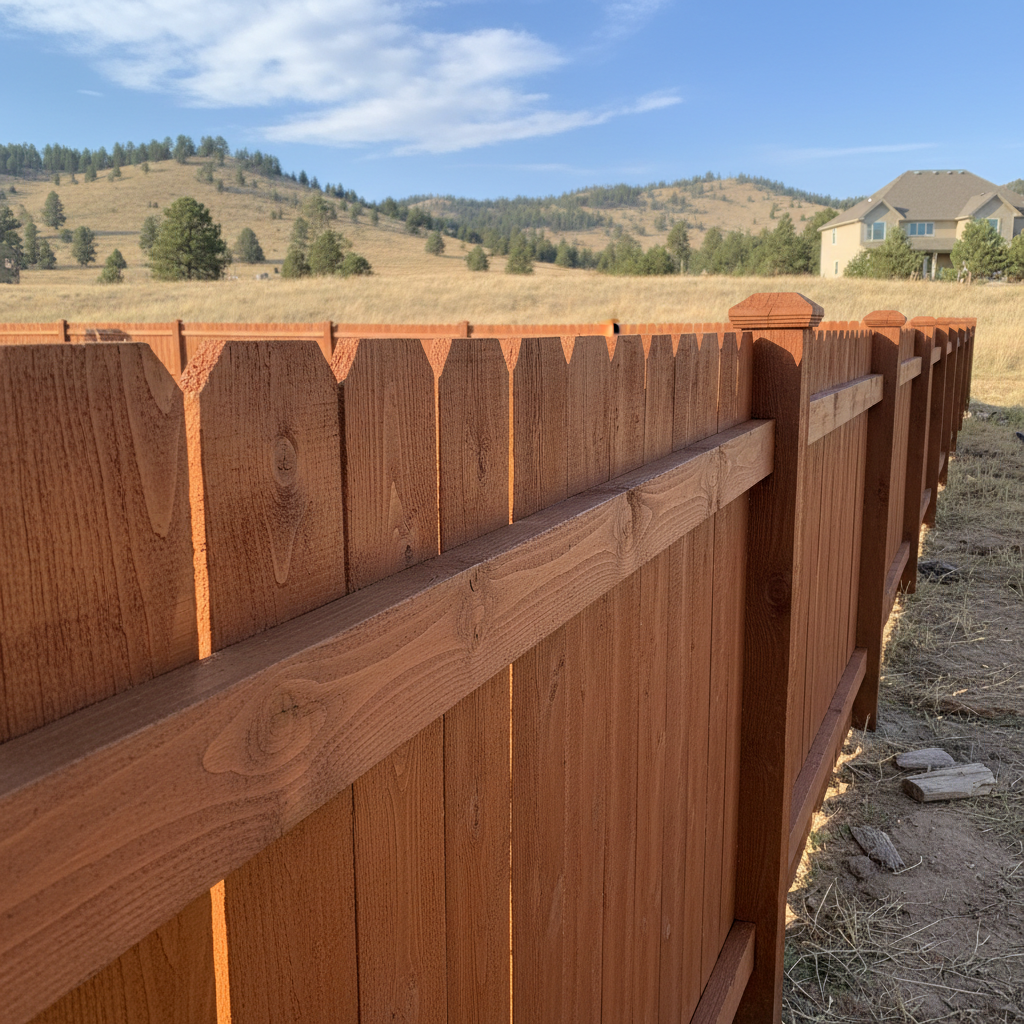
Stain: Stains penetrate the wood. They come in transparent, semi-transparent, and solid. Transparent and semi-transparent stains let the wood grain show through, which I personally love, especially on nice cedar. Solid stains give you more color but still let some of the wood texture show. They offer good UV protection and are generally easier to reapply down the road – you usually just clean and re-stain.
Paint: Paint sits on top of the wood. It gives you a completely opaque color and can offer excellent protection. The downside? If it starts to peel, you're looking at a serious scraping and sanding job before you can repaint. It's also more prone to chipping.
For most residential fences around here, especially with our crazy temperature swings and sun exposure, I usually lean towards a good quality solid or semi-solid stain. It just holds up better and is easier to maintain in the long run. Make sure whatever you pick is rated for exterior use and fences.
Getting Down to Business: Staining or Painting Your Fence
Okay, prep is done, you've got your product. Now for the fun part.
- Check the weather: Don't start this project if it's going to rain in the next 24-48 hours. Also, avoid extremely hot, sunny days. The product will dry too fast, leading to lap marks and an uneven finish. Overcast, mild days are your best friend.
- Protect everything: Lay down tarps or plastic sheeting to protect your landscaping, concrete, and anything else you don't want stained or painted. Mask off any hardware you're not removing.
- Application method: You've got options.
Brush: This gives you the most control and ensures good penetration, especially with stain. It's also the most labor-intensive. Good for smaller fences or intricate sections.
Roller: Faster than a brush for flat surfaces, but you'll still need a brush for corners, edges, and gaps. Use a thick nap roller cover for rough wood.
Sprayer: This is the fastest method, hands down. If you have a large fence, a sprayer can save you days. But, there's a learning curve. You need to practice on some scrap wood first to get an even coat and avoid drips. Overspray is a real concern, especially on windy days, which we get plenty of in Sturgis. You'll need to cover even more surrounding areas if you're spraying. If you're not comfortable with a sprayer, or if you have neighbors' cars or houses close by, stick to brushing or rolling.
- Apply thin, even coats: Whether you're staining or painting, two thin coats are always better than one thick one. A thick coat can bubble, peel, or just look gloppy. Follow the manufacturer's drying times between coats.
- Work in sections: Don't try to do a whole side of the fence at once. Work on a few boards at a time, from top to bottom, keeping a wet edge to avoid lap marks.
After the Job's Done: Keeping it Looking Good
You've put in the work, now you want it to last, right?
- Clean up: Dispose of rags and leftover product properly. Clean your brushes, rollers, or sprayer according to the manufacturer's instructions.
- Cure time: Don't lean anything against the fence or let pets rub up against it for a few days. The finish might be dry to the touch, but it needs time to fully cure and harden.
- Regular inspection: Walk your fence once a year, maybe in the spring after the snow melts. Look for any peeling, fading, or damage. Catching small issues early makes maintenance a breeze.
- Reapplication: How often you need to re-stain or repaint depends on the product, the weather, and how much sun your fence gets. Generally, stains last 3-5 years, paints 5-10. You'll know it's time when it starts to fade significantly or show wear.
When to Call Coastal Fence Co.
Look, I'm all for DIY. It's satisfying to do a job yourself. But there are times when it just makes sense to bring in the pros. If your fence is massive, severely deteriorated, or if you just don't have the time or patience for the extensive prep work, give us a call. We've got the equipment, the experience, and we know how to handle the unique challenges of our local climate, like the strong sun and those occasional hailstorms we get up here in the Black Hills. We can get it done efficiently and with a professional finish that'll last.
No matter what, taking care of your fence protects your investment and keeps your property looking good. Good luck with your project!